The Starting Point
We'd just moved into a 1970s detached house in early 2021. The house wasn't heating well, and a quick inspection revealed why: only 50mm of loft insulation—well under current regulations and barely adequate even for its era.
I got straightforward advice that made perfect sense: "Retain heat you're already adding, rather than add more heat."
Loft insulation was the obvious first step. It was DIY-able, relatively cheap compared to alternatives like new windows, and would establish a baseline for all future efficiency improvements. So in January 2021, we started.
What I didn't know then: this project would take over two years. And that's completely normal.
Phase 1: Immediate Priorities (January - February 2021)
The Purchase
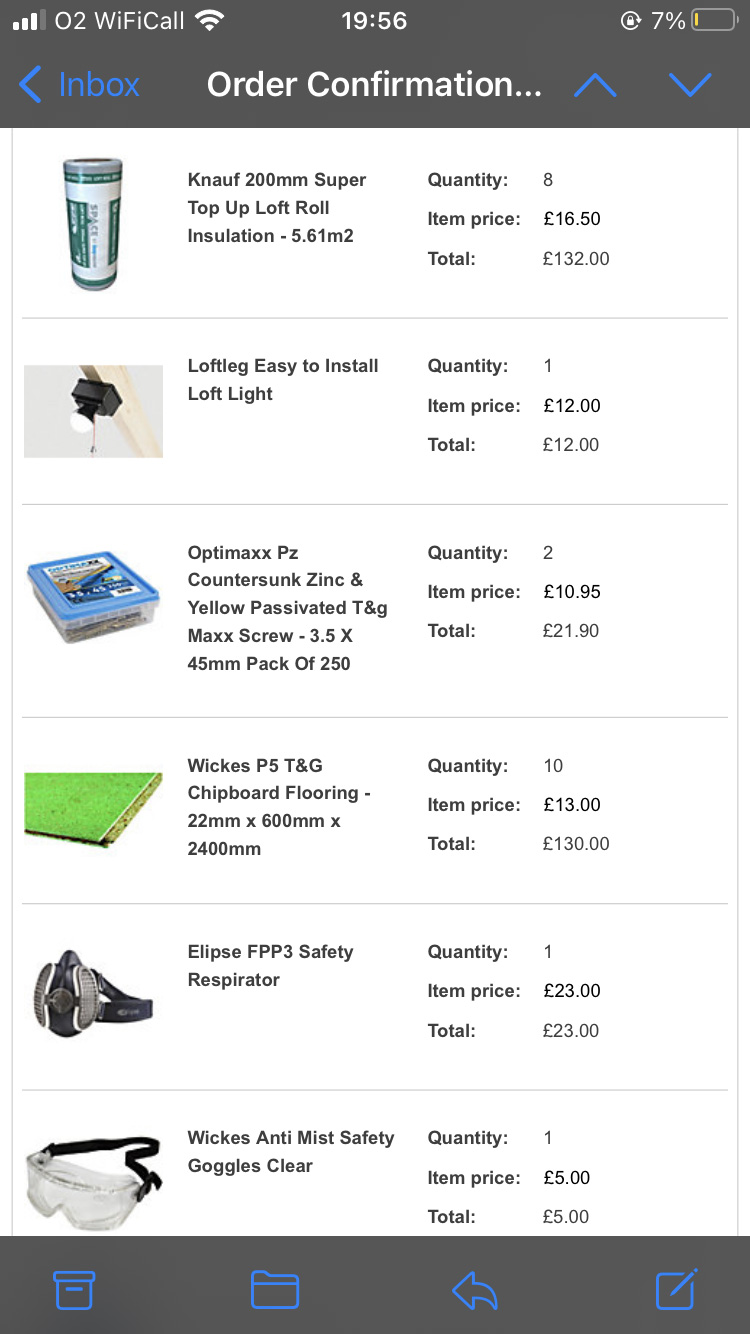
In January 2021, I ordered everything I thought I'd need through Wickes' trade account (10-15% discount saved £56.96):
- Knauf insulation: 100mm + 200mm layers = 300mm to add (£216)
- Loft Leg XL 300mm: 84 legs across 7 packs for raised flooring (£117)
- P5 T&G chipboard: 10 boards, 22mm × 600mm × 2400mm (£130)
- PPE: Elipse FPP3 respirator, goggles, boiler suit, gloves (£47)
- Electrical supplies: Initial tidying work (£29.73)
- Work light batteries: £7.98
Phase 1 Total: £598.09
The key decision: I bought enough boarding for the ENTIRE project upfront. This would turn out to be smart—price inflation over the next two years would have added significant cost.
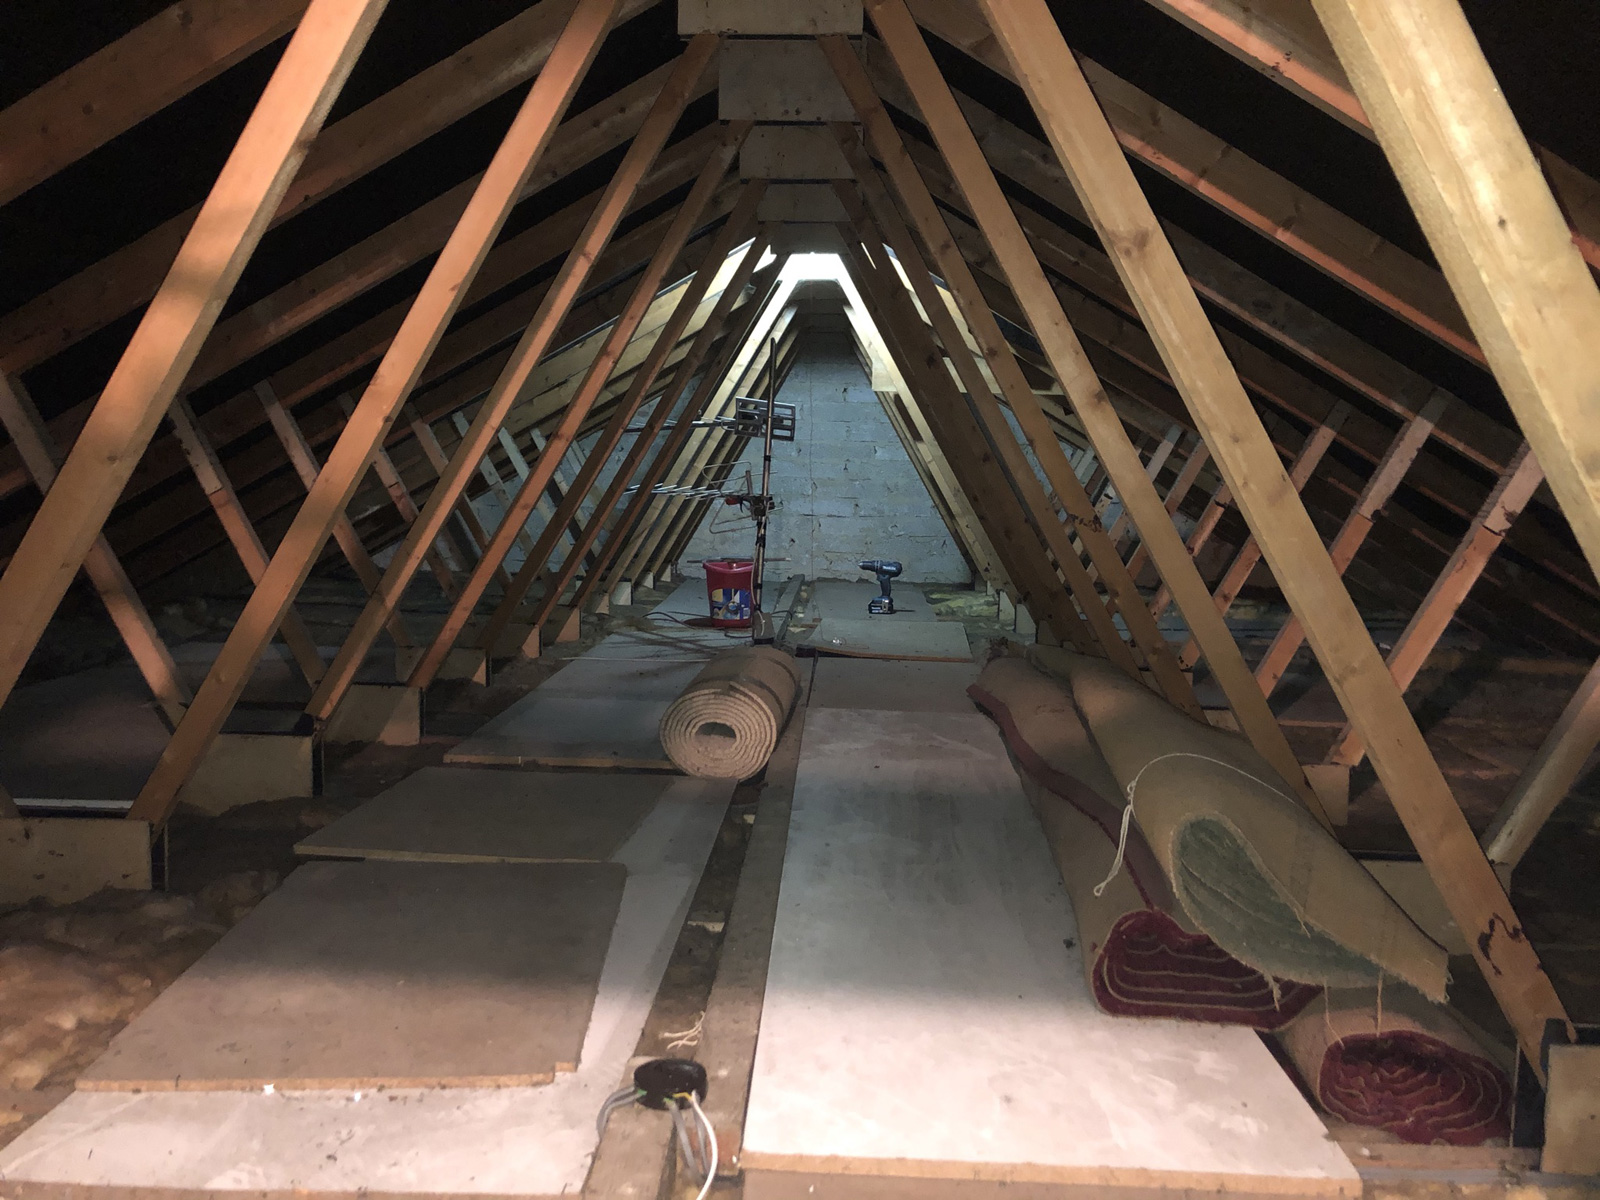
The Strategy: Perimeter First
I didn't try to do everything at once. The plan was:
- Do perimeter and end section first
- This creates edge access for future center work
- Assess the electrical situation before committing to center
- Work in short sessions while people weren't home
The perimeter-first approach proved exactly right. It gave me workspace as I went and let me see the electrical mess in the center before having to deal with it.
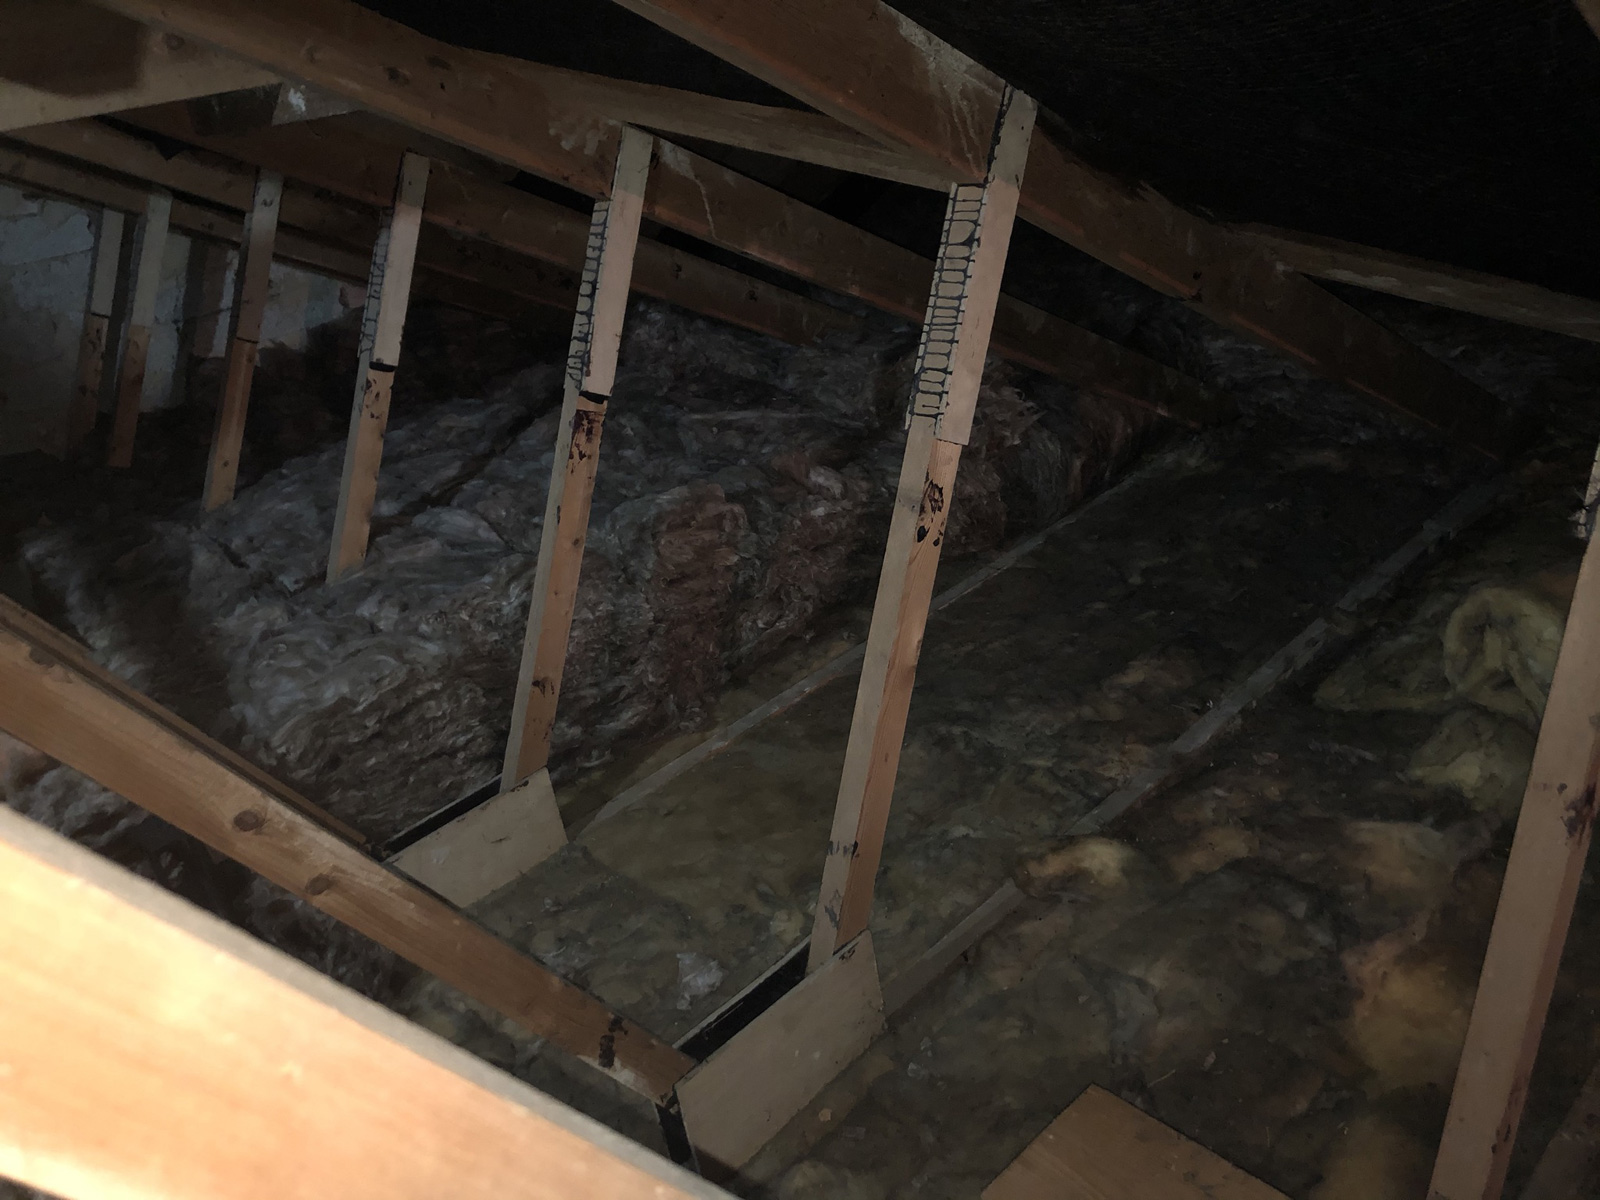
Physical Challenges
Let me be clear: working in a cramped loft is uncomfortable. I couldn't stand up ANYWHERE—not in the corridor, not in the main loft, definitely not at the edges. Everything was done hunched over or crawling.
The insulation itself is incredibly itchy. The £47 PPE investment wasn't optional—it was essential for both safety and comfort. Respiratory protection particularly critical.
One challenge I hadn't anticipated: knee pads. The joists were too narrow. I would have been balancing precariously trying to use them. Result: sore knees from working on narrow joists for extended periods.
But the timing worked: winter loft temperatures were comfortable for working, even pleasant compared to what summer would bring.
The Long Gap: Why 18 Months? (February 2021 - November 2022)
February 2021: Stopped for Toilet Renovation
By February 2021, I'd completed the perimeter and end section. Then we stopped. Not because of lack of motivation, but because priorities shifted—the downstairs toilet needed renovation, and that became the focus through March and April 2021.
That's the reality of home improvement: projects compete for attention, time, and money. One project pauses while another takes priority. It's not failure—it's normal life.
Summer 2021 Onwards: The Heat Problem
Then came the real reason for delay: the loft became unbearably hot.
In winter, the loft was comfortable for work—even pleasant. But summer conditions made extended work unsafe. You can't work safely at height when you're dangerously overheated. The physical discomfort wasn't just inconvenient; it was a genuine risk.
So the project naturally paused. Every summer.
November 2022: The Return
When the weather cooled in November 2022, I picked up the project again. The timing had dual benefits:
- Comfortable working conditions returned
- Heating season starting—motivation to retain heat
But there was a problem: the center strip still couldn't be insulated. The electrical wiring was a mess—too many cables in any given junction box, creating both a fire risk and maintenance nightmare. I couldn't just insulate over that.
Phase 2: The Electrical Challenge (November 2022 - October 2023)
The Discovery
The center strip electrical situation was genuinely problematic:
- Overcrowded junction boxes (fire risk)
- Tangled "rats nests" of cables
- Already difficult to maintain
- Would be WORSE with 300mm insulation on top
I couldn't proceed. Building regs aside, it wasn't safe. The electrical work had to come first.
The Solution: Maintenance-Free Junction Boxes
I'd ordered the solution ahead of time in January 2022 for eventual use: five Hager J804 maintenance-free junction boxes at £25.08 total.
Hager J804 Junction Boxes
Cable organization makes these straightforward to understand and use. Building regs compliant when installed above insulation level for maintenance access.
As an Amazon Associate, I earn from qualifying purchases at no extra cost to you.
The Methodical Installation Process
In October 2023, I tackled the electrical overhaul systematically:
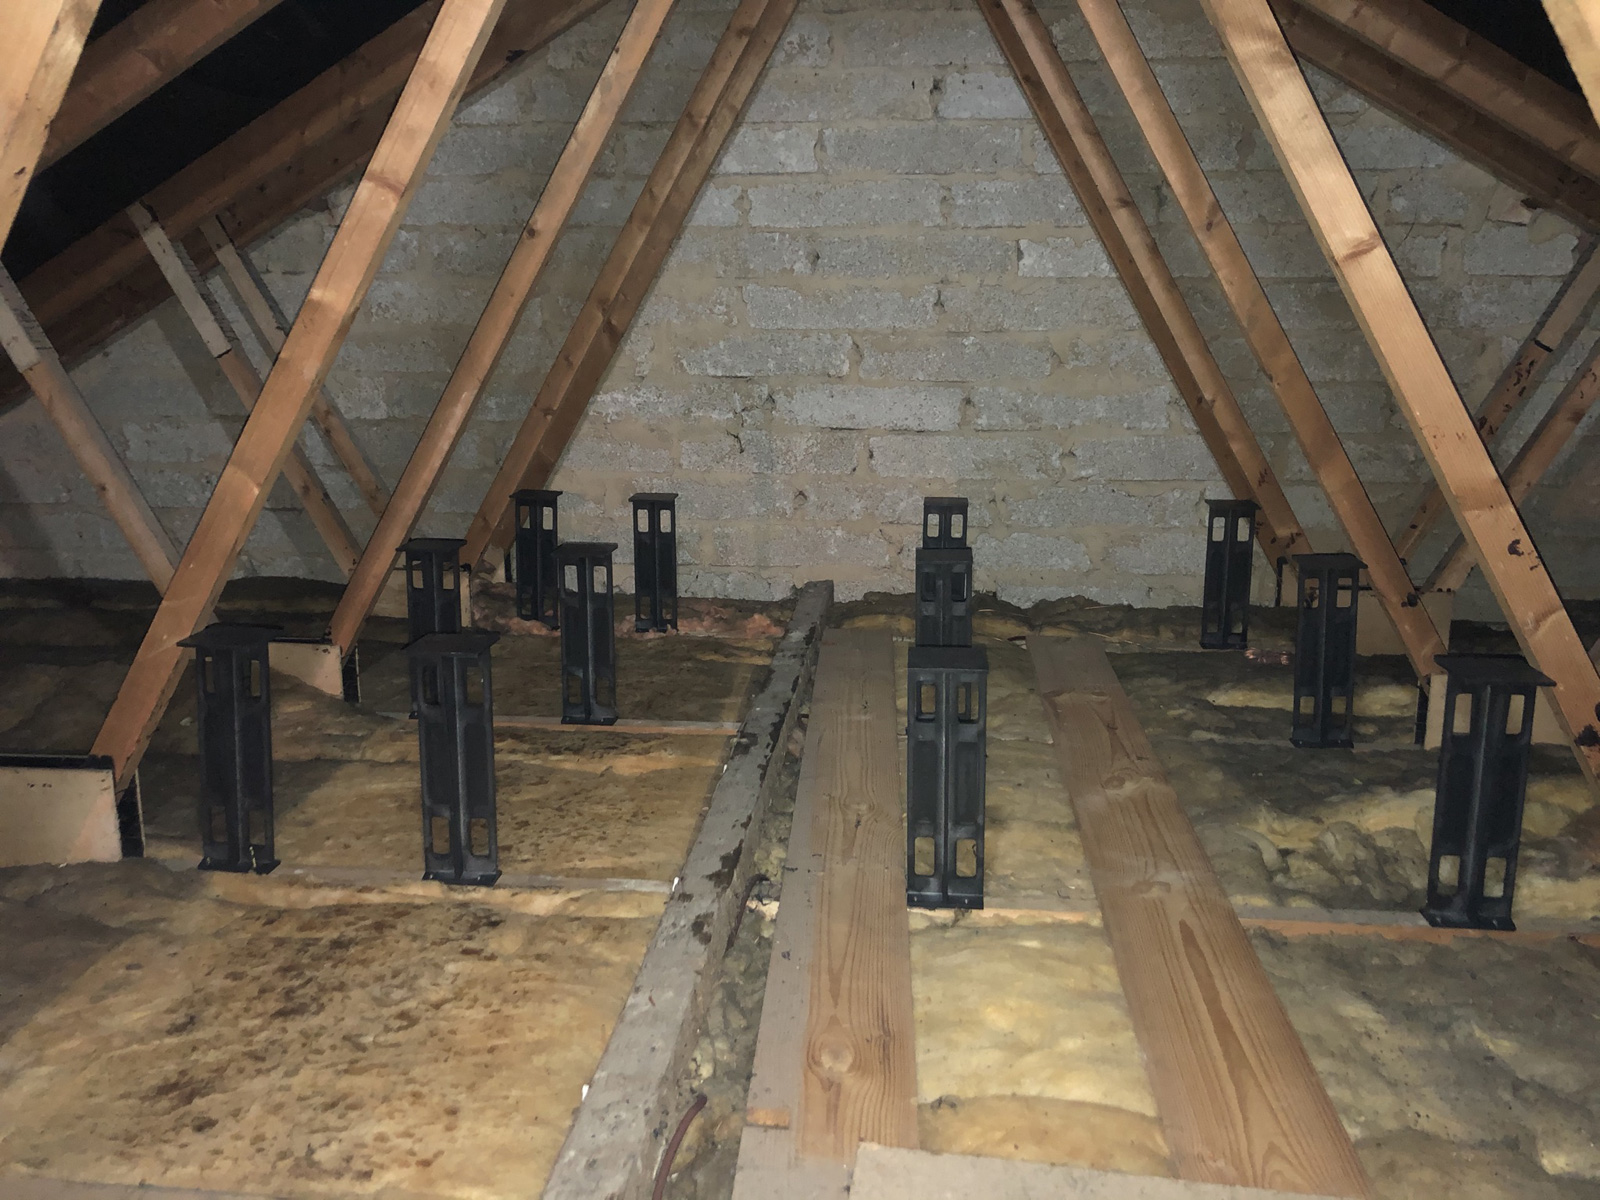
- Attached wooden boards to roof webs (joists/rafters)
- Relocated junction boxes to boards ABOVE insulation level
- Over-sleeved all cables with updated colour codes
- Ran new cables between junction boxes
- Marked purpose on boards for future reference
To map the lighting circuits, I developed a systematic testing method:
- Turn electrics off at consumer unit
- Go to loft, disconnect one cable
- Come back down, turn electrics on
- Note which lights no longer work
- Document the circuit
- Repeat for next cable
This programmatic approach meant no surprises and clear documentation for future maintenance.
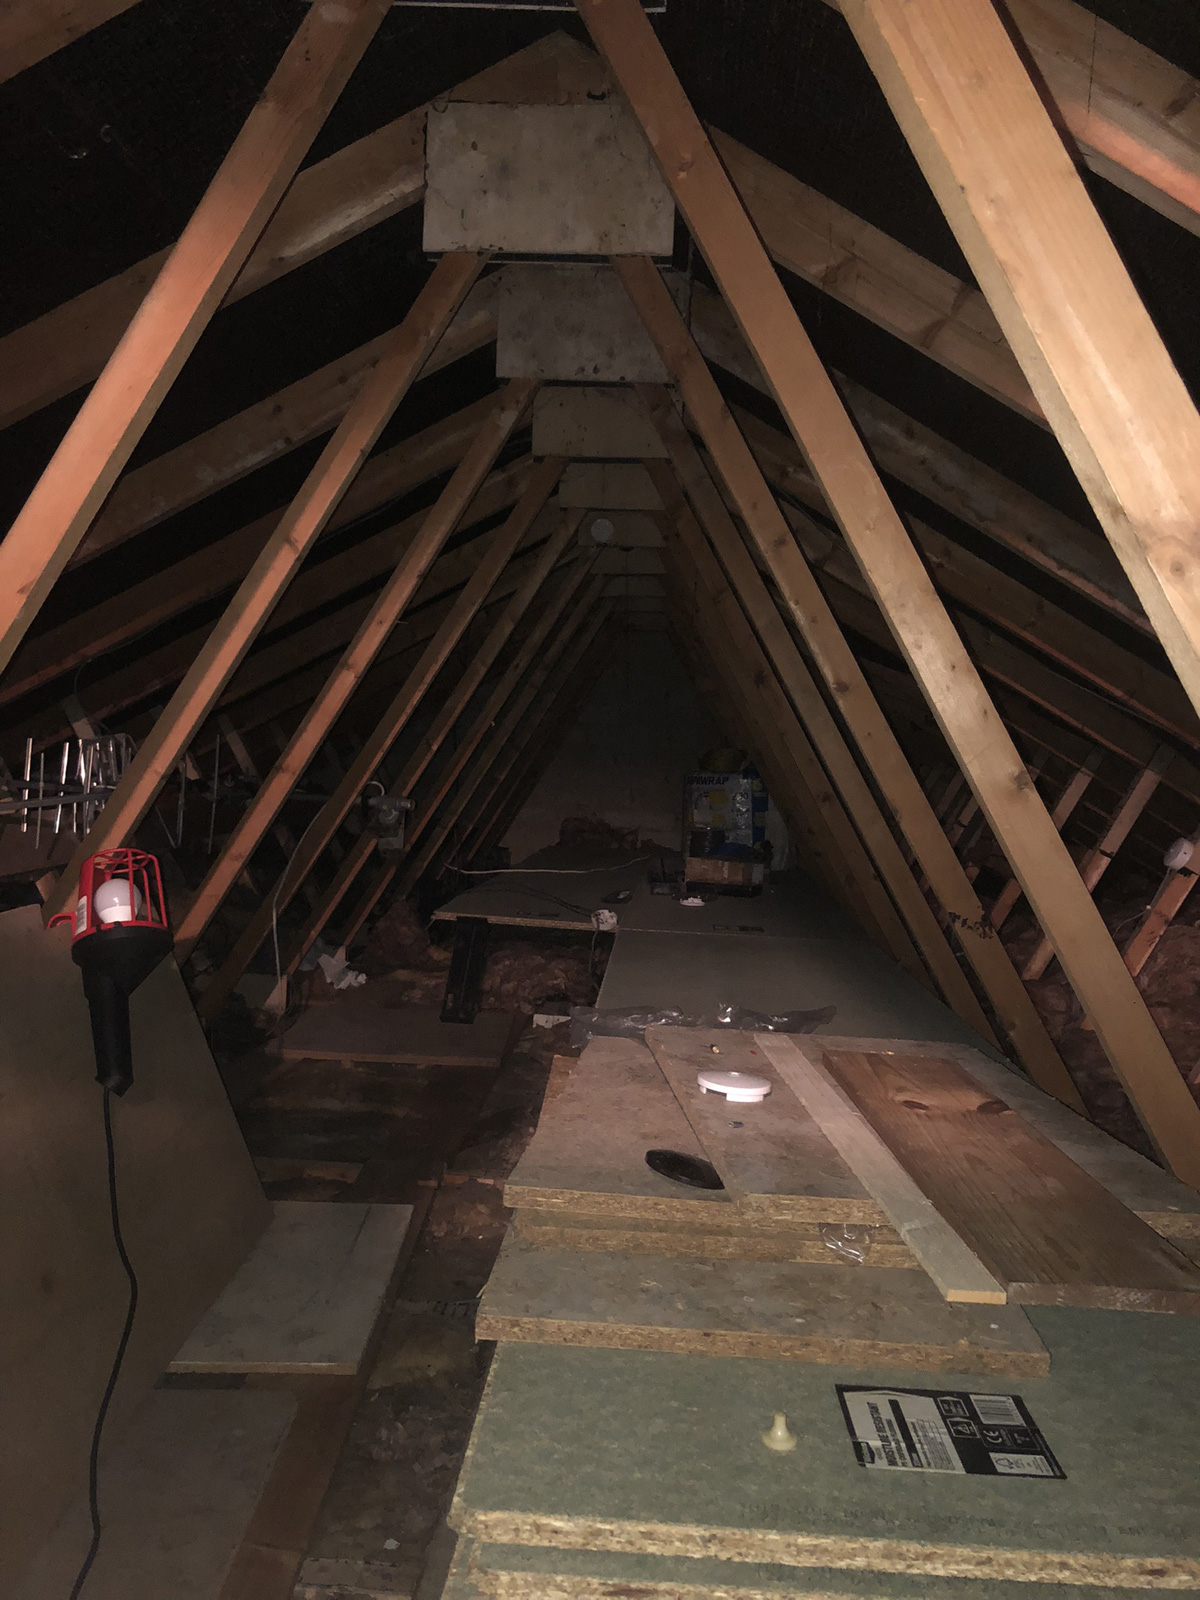
Phase 2 Continued: Central Boarding (November 2022 - Present)
The Bit-by-Bit Strategy
Remember those 10 chipboard boards I'd bought in Phase 1? They'd been waiting. Now I could finally use them—but I took a bit-by-bit approach rather than trying to do everything at once.
The advantage: each board placed creates a platform for working on the next section. Progressive, methodical, sustainable. The strategy works beautifully.
Current Status
- Phase 1 complete: Perimeter and end section finished
- Phase 2 ongoing: Central corridor in progress
- Present walkable area: ~6-8 meters
- Planned completion: ~8-10 meters long × 2.5 meters wide corridor
Important clarification: this isn't for storage. It's a maintenance access corridor—safe walking for future work, not long-term storage.
What I'd Do Differently: The Key Lesson
If I could start over, there's one thing I'd change that would have saved significant hassle:
Unclip Lighting Cables BEFORE Adding Insulation
Here's the problem: old lighting cables were clipped beneath the original 50mm insulation. I then added 300mm new insulation on top. Total depth: 350mm.
Now when I need to access those cables for the electrical overhaul, I have to work through 350mm of insulation. It's difficult, disturbing, messy.
The better approach:
- Unclip lighting cables FIRST when only 50mm on top
- Much easier access
- THEN add 300mm new insulation
- Rerun cables above insulation if needed
Accessing cables through 50mm: straightforward, quick, clean.
Accessing cables through 350mm: difficult, disturbing, messy.
Lesson: Plan electrical work BEFORE insulation work.
What I Got Right
Not everything was mistakes. These decisions were validated:
- ✅ Perimeter first strategy: gave workspace as I went
- ✅ Bit-by-bit boarding: creates platform progressively
- ✅ Buying all materials upfront: avoided price inflation
- ✅ PPE investment: essential for safety and comfort
The Old Water Tank Dilemma
There's an old water tank up there that may be asbestos-cement material—common in 1970s homes. It won't fit down the loft hatch if removed.
The pragmatic solution: leave it undisturbed. If it eventually needs removal, bag it, label it, move it to the end of the corridor. Undisturbed asbestos poses minimal risk.
This is part of a broader philosophy: don't let asbestos fear drive unnecessary £1,500-per-room expenses. Pragmatic approach—leave alone if undisturbed and in good condition. Encapsulation is valid for areas not being renovated.
Research Approach: Pattern Recognition Over Single Sources
I didn't follow any specific YouTube videos. Instead, I watched many different sources and looked for common themes across multiple videos. Pattern recognition over individual instruction.
The key advice that appeared everywhere: Eaves ventilation is CRITICAL.
Do NOT insulate too close to eaves. It blocks airflow between outside and loft space, preventing circulation and causing moisture/damp buildup. This warning appeared consistently across multiple sources—which made it reliable advice.
Total Project Costs & ROI
Complete Cost Breakdown
Phase 1 (January 2021): £598.09
- Knauf insulation: £216
- Loft legs (7 packs): £117
- Chipboard flooring (10 boards): £130
- PPE (respirator, goggles, suit, gloves): £47
- Work light batteries: £7.98
- Electrical supplies (initial tidying): £29.73
- Discount saved: £56.96
Phase 2 (January 2022 - Used October 2023): £25.08
- 5× Hager J804 junction boxes: £25.08
Total Project Investment: £623.17
Labor Cost: £0 (all DIY)
Professional installation estimate: £800-1,200+
DIY savings: £177-577+
Energy Impact
The loft insulation established our Year 1 baseline: 18,539 kWh/year (£1,166/year at 6.29p/kWh). This became the foundation for measuring all future improvements.
By our most recent 12 months (after radiators, boiler, and optimization), we're at 10,115 kWh/year (£636/year)—a total reduction of 45.4%, saving £530/year. The loft insulation was the first and most important step in that journey.
Isolating the loft's specific contribution is difficult since each improvement enabled the next. But as the foundation of our whole-house efficiency strategy, its strategic value exceeded any simple ROI calculation.
The Two-Year Timeline: Why It's Normal
Project dates:
- January 2021: Started Phase 1
- February 2021: Phase 1 perimeter complete, stopped for toilet renovation
- March-April 2021: Toilet renovation
- Summer 2021: Too hot to work
- November 2022: Resumed Phase 2
- October 2023: Electrical overhaul completed
- Present: Central corridor ongoing
Total elapsed time: 2+ years and counting
But here's why the timeline doesn't matter:
- ✅ Phase 1 delivered immediate heat retention
- ✅ Each completed section provides benefit
- ✅ Not a race—quality over speed
- ✅ Gaps allow reassessment and planning
- ✅ Seasonal working more comfortable
Your two-year project is normal. Not failure, just reality. Life happens between work sessions. Phased completion is perfectly valid. Finished is better than perfect. Start, pause, resume—all acceptable.
The perspective: Quick = professional crew, higher cost. Slow = DIY approach, lower cost, spread over time. Neither is wrong, just different trade-offs. Our approach: time instead of money.
Key Lessons for Other DIYers
Strategic Sequencing
✅ Loft insulation FIRST before other improvements—cheapest efficiency improvement, foundation for all others, DIY-able for most people, shortest payback period.
Electrical Assessment
✅ Check wiring BEFORE insulating—don't cover problems with insulation, fire risk from overloaded junction boxes, maintenance access matters.
✅ Unclip lighting cables BEFORE adding insulation—much easier with minimal insulation on top. Learn from my mistake.
Seasonal Working
✅ Accept natural pauses—summer loft unbearably hot, winter comfortable. Some projects take years—that's OK. Don't beat yourself up over "slow" progress.
Material Purchasing
✅ Buy materials upfront if possible—avoided price inflation over 2 years. Materials don't expire. Price lock strategy.
Phased Approach
✅ Perimeter first, center later—gives workspace for future work, logical progression, allows assessment before committing to center.
✅ Bit-by-bit boarding works—creates platform as you go, safe progression, incremental progress sustainable.
PPE Investment
✅ Don't skimp on safety equipment—£47 for respirator, goggles, suit, gloves. Loft insulation incredibly itchy. Small cost for significant comfort/safety.
Research Approach
✅ Watch multiple sources, identify patterns—don't rely on single video. Common themes = reliable advice. Understand WHY, not just HOW.
Risk Assessment
✅ "If I'm fearful, I don't attempt it"—clear personal boundaries. Know when to call professionals. DIY confidence through systematic approach. Safety over savings.
Conclusion: Embrace the Timeline
This project took over two years. It's still ongoing. And that's completely fine.
Phase 1 delivered immediate heat retention that established our baseline for all future improvements. The electrical work was necessary before proceeding—doing it right mattered more than doing it fast. The bit-by-bit boarding creates a safe maintenance corridor that will serve us for decades.
The £623 investment saved an estimated £177-577 in professional installation costs while teaching me valuable skills. But more importantly, it became the foundation for our 45.4% total energy reduction—enabling oversized radiators, right-sized boiler, and heat curve optimization.
Would I do it again? Absolutely. Would I unclip the lighting cables first? Definitely. Would I stress less about the timeline? I hope so.
If you're starting a loft insulation project, remember: two-year timelines are normal. Summer heat will stop work. Electrical issues will surprise you. And that's all OK.
Start. Pause when you need to. Resume when you can. Your phased DIY project is just as valid as a professional crew's quick completion—it's just a different trade-off.
The mess is temporary. The heat retention is permanent. And your two-year project is right on schedule.